
How To Use A Sewing Machine-Beginner’s Guide to Using a Sewing Machine
Learning to use a sewing machine can feel overwhelming at first, but once you understand the basics, it becomes much easier. This guide covers the essentials for getting started, from setting up the machine to troubleshooting common issues.
Getting to Know Your Machine
A sewing machine uses a needle to push the top thread through the fabric, while the bottom thread from a bobbin locks it in place. To start, plug in the power and foot pedal, then switch the machine on. On computerized models, the screen will light up and reset.
Become familiar with key parts of your machine. These typically include a pattern selection dial, a reverse lever for locking stitches, thread tension control, a bobbin winder, a spool pin for the top thread, and a bobbin compartment under the needle plate.
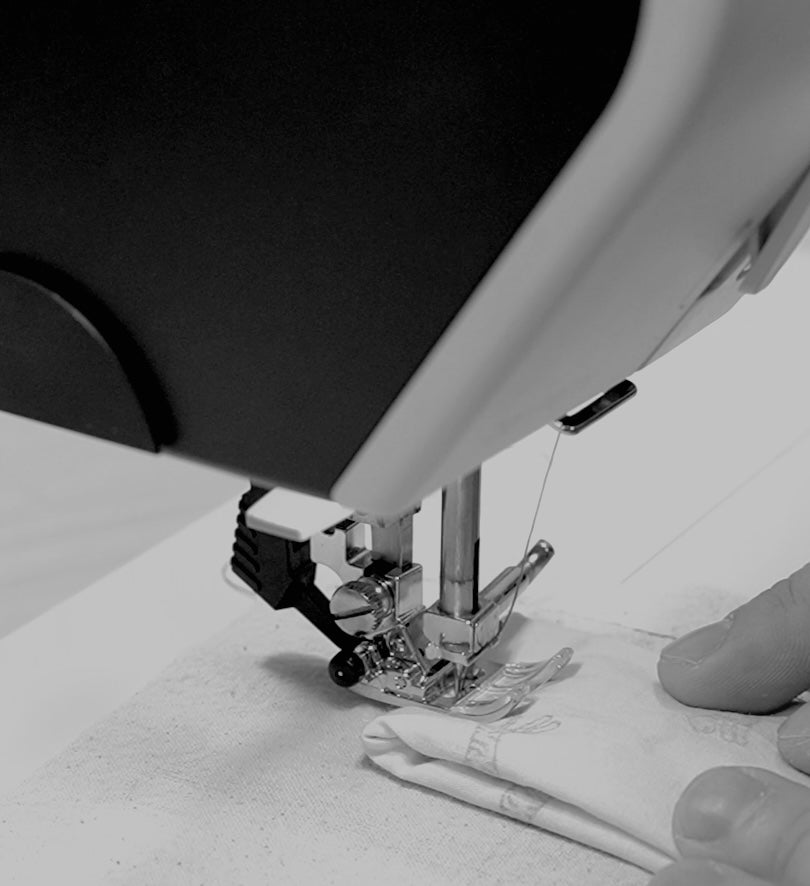
The presser foot holds fabric down while feed dogs underneath move it. The hand wheel manually moves the needle—always turn it toward you (counterclockwise).
Threading the Machine
To sew, you need both a top thread and a bobbin thread. Start by winding the bobbin: place a thread spool on the spool pin, wrap the thread around an empty bobbin, place it on the bobbin winder, and press the foot pedal to wind. Once full, insert the bobbin into its compartment and pull out a few inches of thread.
Thread the top thread by following the machine’s diagram—usually through guides, around the tension disc, and through the take-up lever.
Finally, thread the needle front to back. Hold the top thread, turn the hand wheel to lower and raise the needle, and pull up the bobbin thread. Move both threads to the back of the machine.
Essential Tools and Supplies
You’ll need fabric scissors, a tape measure, straight ruler, seam ripper, marking tools (like chalk or water-soluble pens), and pins or clips. Use high-quality thread and have several bobbins ready. Use the correct needle: universal needles work for most fabrics, while ballpoint needles are best for knits.

Basic Sewing Techniques
Most machines default to a straight stitch, which works well for woven fabrics. For stretchy or unfinished edges, use a zigzag or stretch stitch. Start with a stitch length of 2.5 mm.
To begin sewing, lift the presser foot, place your fabric underneath, and lower the foot. Align the fabric with the seam guide. Press the foot pedal gently to sew. Let the feed dogs move the fabric—don’t push or pull. Guide the fabric with your hands for control.
At corners, stop with the needle down, lift the presser foot, pivot the fabric, and continue. At the beginning and end of each seam, sew a few stitches forward, then a few in reverse to lock the stitch.
Finishing and Hemming
Fabric edges may fray, so finish them with a zigzag stitch, overlock stitch, or pinking shears. To hem, fold the fabric edge twice and sew along the inner fold. Pressing the fold first makes sewing easier and neater.
Troubleshooting Tips
If the machine vibrates, check that it’s on a stable surface. If it sews slowly, clean and oil it. If thread jams or breaks, check threading, tension, and needle condition. Uneven stitches or puckering may be caused by incorrect tension or the wrong needle. Always use the right needle size for the fabric you’re working with.
Final Advice
Always keep your hands clear of the needle and remove your foot from the pedal when adjusting fabric. Practice on scrap fabric before starting a real project. With patience and consistent practice, you’ll grow more comfortable and confident with every stitch.